Author Archives: Bill

A Fun (And Challenging!) Way To Improve Your Time And Expand Your Rhythmic Imagination

Pulse, rhythm, meter and feel. These are the essential components of time that musicians utilize to create music.

I’ve been nearly obsessed with exploring and better understanding how our perception of time impacts our music (including going deep into the science of how our brains perceive time). Even our most basic movement skills are coordinated through our sense of time.

Without time, there is no coordinated movement. None. And without coordinated movement, there is no music.

In every practice session I’m working on things that challenge and expand my sense of time. Again: pulse, rhythm, meter and feel. (I’ve even composed two eBooks with exercises in polymeter and multiple time subdivisions that document some of my explorations.)

One of the “staples” of my work with time is using multiple, simultaneous pulses; i.e., working with more than one tempo at a time (no pun intended). I usually do this either with metronomes and/or with drum grooves (I really like the Smartphone app Drum Genius for this!)

I’ve been working this way for several years now, and I continue to reap wonderful benefits from my efforts. If you haven’t practiced with multiple time sources, I highly recommend that you do so. Here’s why:

The three most palpable skills that you will cultivate from practicing with multiple tempos are:

1 Improved “precision” in your perception of pulse (steadier, more reliable sense of time)

2 Improved flexibility and adaptability in changing tempos (finding the “groove” more immediately and solidly; not getting “stuck” in certain tempo ranges)

3 The ability to actively and accurately “imagine” tempos nested within tempos (this is especially useful for improvising musicians!)

As you work this way you will also find that your technique becomes cleaner and more precise as well (though without losing the musical flexibility that is so important to expressive and dynamic playing).

Here’s a simple way to get started:

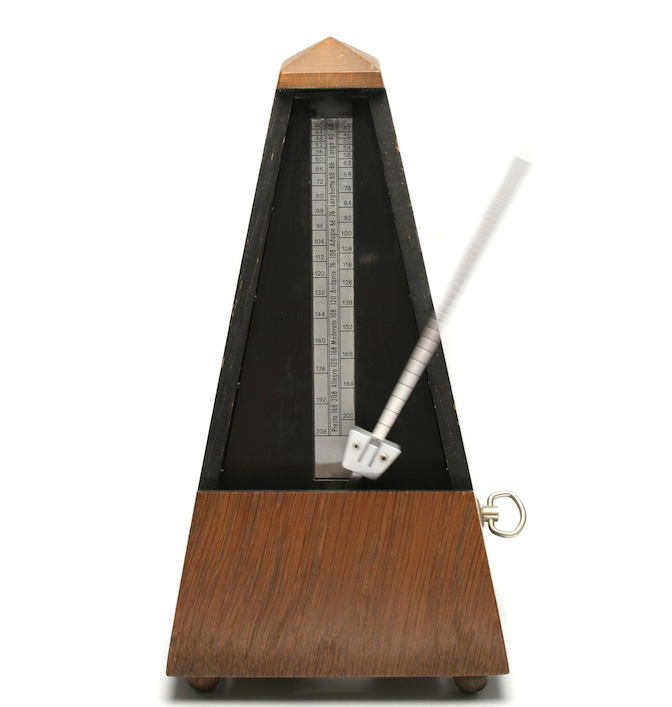
Begin by using two metronomes that have slightly different sounding clicks (this makes it easier for you to perceive of and integrate the two pulses).

Set one metronome at half notes, around 60 bpm. Set the second metronome at 2/3 the tempo of the first. So in this case, half notes at 40 bpm.

Find a simple scale or melodic pattern to practice, composed of quarters and/or eighth notes (again something simple). Start at the faster tempo and play the pattern a few times to embody the tempo as you “notice” the click of the slower metronome.

At a certain point, jump over to the slower metronome and play the same pattern at the slower tempo. Aim for embodying the new tempo as soon as possible. Once you feel that you’ve locked in the new tempo, switch back to the original tempo, and so on, moving back and forth between tempos.

Whichever tempo you are in, see that you are “hearing” (but not necessarily “listening to” the other metronome clicks).

The aim here at first is not so much being able to conceive of both tempos simultaneously, but rather that you can easily and readily switch between tempos.

Once you’re comfortable with all these activities, add another challenge. Perhaps it is to play a particular piece (etude, solo transcription, etc.) as you move back and forth between tempos. Or you can also add more rythmic complexity the original scale pattern you started with, using triplets, quintuplets, syncopation, etc.

If you’re an improviser, the next challenge could be improvising with the two metronomes. First, just improvise over a mode, scale, or simple riff, something devoid of a specific time/harmonic form. Once you feel solid doing that, improvise over a short, familiar harmonic form (maybe the blues?) And so on, again, adjusting the time/harmonic form to fit the new tempo.

When you get to the point where you’re able to function well in these two tempos, decrease the differences in time between the two metronomes. Maybe set one at half note at 60 and the other at half note at 45. You can continue to lessen the tempo differences until you get both metronomes at nearly similar tempos (say 60 bpm at one and 55 bpm at the other).

At whatever two tempos you’re working with, take some time to sit and listen (without playing) to how the two tempos eventually converge and make a singular, simultaneous click. Try to conceive of and anticipate this occurrence. Find the pattern.

And of course, you can also play around with different drum loops, perhaps exploring not only multiple times, but multiple feels and metered subdivision. For example I like working with the metronome clicking on half notes, while I add a drum groove in 4/4 that is subdivided into four, 3/4 patterns (12 beats over three measures).

If you’re truly brave and adventurous, you can add a third (or more?) time source.

If you continue to work this way, you will learn (as I have) to actually “hear and imagine” more than one tempo and subdivision simultaneously. As I’ve stated above this will not only make you a “stronger” musician (better reader, time keeper, etc.), but will open up amazing roads as an improviser, allowing you to create an abundance of rhythmic tension and release.

So give it a try. Have fun with it! Explore, learn. And grow as you do so!

New E-book: Encyclopedia of Triad Pairs

I’m pleased to announce that my latest e-book, Encyclopedia of Triad Pairs: A Playable Reference for the Improvising Musician, is now available for purchase and immediate download.

Triad pairs (i.e., the combination of two triads that share no common tones) are a staple of the modern jazz language. Exploring and practicing with triad pairs can reveal seemingly endless melodic possibilities when improvising. And if you’re not an improvising musician, practicing regularly with triad pairs will challenge and improve your technical skills.

In this e-book, I’ve used major, minor, diminished and augmented triads to present a comprehensive entry point into exploring triad pairs that can be formed from diatonic, polytonic and symmetrical tonalities. I demonstrate how to apply these triad pairs over dominant chords resolving to tonic. In doing so I also show how each pair can be organized as a stand alone “mode”, as well as how to insert chromatic passing tones in order to add even more melodic possibilities and interesting tensions.

Whether you’re new to working with triad pairs or not, this book serves as both an entry point for the novice, as well as a comprehensive reference for the more experienced improviser. With over 120 pages of notated musical exercises, you will have lots to work on!

So take a look at the landing page on my blog, which has a pdf sample of one of the notated exercises, as well as a pdf copy of the written introduction of the book, which further explains the concept, the format, the benefits and the practice guidelines for implementing the work.

And as always, let me know what you think! Thanks!

Clarifying A Common Misconception About “Tension” In Playing Music

On the first day of the semester in each of my classes at the performing arts college where I teach the Alexander Technique, I often ask this “trick” question:

“Is it possible to perform (music, acting, dance, etc.) free of tension?”

Typically, the majority of the class answers with a resounding “yes” (as they’ve come to believe that’s what they want, that’s why they’re taking my class).

But the answer to this question is simple: No.

It is impossible to move, maintain balance, breathe, or otherwise function on even the most basic level without some sort of muscular tension. This is not a matter of “opinion”. It’s a matter of fact. It’s part of our human design.

Even when you’re feeling completely “relaxed” there is a certain, necessary amount of postural tone in your body to help you counter gravity (even when you’re lying down.)

So why do so many of these students, themselves aspiring performing artists, answer “yes” to this question?

It’s simple. They think that “tension” is their enemy.

They think that all the problems they have with their movement, posture, breathing, voice, etc., would simply vanish if they could somehow eliminate “all the tension” in their bodies.

But it’s not as simple as that.

It’s not a matter of being “free of tension”, but rather, of recognizing and preventing what I call misdirected effort. It is this “misdirected effort” that is too often perceived and labeled generically as “tension”.

It is this misdirected effort that makes playing music (or engaging in any kind of performance activity) seem “difficult”, “tense”, “stiff”, “stuck”, “rigid”, “unnatural”, “labored”, “self conscious”, “unsure”, “unsatisfactory”, etc.

Okay, so what’s the problem trying to avoid any kind of “tension” when playing your instrument?

The most fundamental problem is that doing so can make you reluctant to sense and accept even the well-directed muscular effort that is necessary to play your instrument.

So as a musician, what might “misdirected effort” be for you?

I’d say it’s anything that you do habitually as you play your instrument that is not only unnecessary to the act of playing that instrument, but also interferes with your natural coordination and your skill.

It is working against the reality of your human design, rather than working in harmony with it.

Let’s look at this example of a fairly common habitual pattern of misdirected effort you might have if you were a pianist:

Whenever you move up or down the keyboard playing a rapid and/or powerful passage, you narrow and raise your shoulders while pulling your head down into your spine.

Now, you might still be able to play just fine doing that, but not because of what you do. That pattern of “effort” (raising/narrowing your shoulders, etc.) doesn’t help you to carry out your wish to play the passage.

In fact, all this misdirected effort in your head/neck/shoulders has a tendency to be an obstacle to the freedom necessary in your arms and hands to play the passage skillfully and expressively.

So in this case, you’re able to play the passage despite doing that (your habitual pattern of misdirected effort), not because of it.

But no matter which instrument you choose, the more you recognize and prevent patterns of misdirected effort, the easier it gets to play that instrument. (Not to mention safer, more consistent and more satisfying!)

So you can observe yourself with this simple question: “What am I doing that is not necessary to the act of playing my instrument in this moment?”

This question (simple as it is) is something that should never be answered definitively. and completely Rather, it is a way for you to explore and discover continual improvement and growth as a musician.

After all, something that seems “necessary” today might not seem so necessary after some days of exploration. Calling what you do into question as you practice is not that same as “doubting” yourself or your technique. It’s just a tool to open up possibilities.

Another good question to ask as you explore and call into question something that might seem like an habitual pattern of misdirected effort is: “What’s it like when I don’t do that?”

And as you ask that question, you might come up with other questions, like:

“Can I still get the sound that I want when I don’t do that?” (if not, why not?)

“How does not doing that affect my sense of time?”

“What changes favorably in my body as I don’t do that?” (or unfavorably?)

“Do I feel ‘undernergized’, perhaps ‘unable’ to play when I don’t do that?”

“Do I rely upon feeling this misdirected effort to ‘believe’ that I’m playing my instrument ‘correctly’?”

And so on…

Some of the more basic things to examine as you explore are:

Your head/neck/jaw relationship. (Is it rigid or free?)

Your shoulders/arms. (same as above)

Your knees (free to move, or “locked”?

Your breathing (noisy and “forced”, or dynamic but “easy and available”?)

Your eyes/gaze (fixed or mobile/dynamic?)

Your balance/connection to the ground (light and expansive, or heavy/compressive?)

(And again, as I mentioned above, anything you notice in your observations can be addressed with that first question: “What am I doing that’s not necessary…?”)

So in the end, “tension” is neither your enemy, nor your friend. It is simply something that takes place between your thoughts and your body. As F.M. Alexander (the founder of the Alexander Technique) stated:

“You translate everything, whether physical, mental or spiritual, into muscular tension.”

Tension is necessary for you to live, and for you to play music. Misdirected effort is not.

Five Checkpoints For Healthy And Efficient Practice

As I write this post, I can easily say we are living in “historic times”. Because of the current health crisis, people from all over the world are staying inside (thankfully!) much more than usual.

And based upon the significant increase in inquiries about my remote services and my e-books, I can also safely assume that musicians worldwide are practicing their instruments considerably more than usual, as well.

And that’s a good thing, perhaps a small silver lining to this cloud.

So I thought I’d share some very basic principles based upon the Alexander Technique, as well as my experience coaching musicians of all kinds (as well as my own experiences practicing saxophone and improvisation).

These are things to pay attention to that can better enable you to optimize your practice efforts, as well as help you avoid injury or strain from increasing your daily practice time.

I’ve narrowed the topic down to what I consider to be five of the most essential things you can take into account (i.e., five “checkpoints”) in the practice room.

These checkpoints serve as a quick, simple and comprehensive way to take care of yourself as you practice. Here they are:

1. Your head/neck relationship

In Alexander Technique jargon, the dynamic relationship of your head to your spine is called the “primary control”. F.M. Alexander discovered that this relationship is key to governing your overall coordination (hence, the word “primary”).

So as you practice, take a bit of time to notice what’s going on between your head and neck. Is your head balancing freely as you start to play, or are you stiffening your neck, perhaps pulling your head downwards into your spine?

If you allow your head to release upward into free and easy balance on your spine, you might also notice that your shoulders and arms become freer.

If you allow for it, this freedom will tend to spread throughout your body all the way down to your feet, gently encouraging you to release in your back, and unlock your knees and your ankles.

Think of your entire self as expanding into length and width as you play. This expansion is not rigid “posture”, but rather, is dynamic elasticity.

2. Your connection to the ground

Your connection to the ground both supports your head/neck relationship, as well as is influenced (for better or worse) by it.

Allow the ground (or if you’re sitting, the chair) to accept your weight, but don’t collapse downward to do so. Think of your body has having a light, easy and upward suspension that interacts dynamically and efficiently with the ground to counter the downward pull of gravity.

3. Your breathing

Whether you use air to make sound on your instrument, or not, breathing is essential to you coordination, poise, consciousness and power.

For the most part your breathing will “do itself” just fine if you let it. In other words, your brain knows just what to do to breathe optimally if your habits don’t interfere.

In short, think of your entire torso (especially your ribs!) as being free to move in all three dimensions (side to side, front to back, top to bottom) in order to produce the movements necessary for inhalation and exhalation. Don’t aim for anything that feels labored or unnatural.

4. Your external environment

No matter where you practice, always use your senses/attention to include the room you’re in.

This is a matter of allowing your senses to open up and reach outward. So listen for your sound out into the room (as well as hearing or “feeling” it close to you or even “inside” of you).

And let your eyes be free to see the room as well. Not in any kind of distracting way, but rather, as a way for you to get better oriented into your practice space.

If you tend to always close your eyes when you practice a particular thing, experiment with what it’s like to not do that, to actually let your attention be flexible enough to go inwards (towards you) and outwards (where your sound ultimately comes to life) at the same time. Think of your attention as being “inclusive and flexible”.

5. Your use of time

When I talk of “use of time” here, I’m really talking about time as a broad, multi-faceted subject.

There is “time” as it relates to how you play rhythms, meter and inflections. What you do with your metronome, or backing track or drum groove, etc. Because all of your coordination ultimately depends upon your perception of time (“pulse”), I encourage you to make time the most essential musical element whenever you practice, no matter what you’re practicing (even when working on your sound).

And then there is how you use your time to pause and redirect your attention/efforts while practicing a particular thing. It is never a waste of time to stop, notice and redirect. This is an essential tool of the Alexander Technique, and something that takes a good deal of discipline to implement (but it is so well worth it!)

As you learn to pause and redirect, you open yourself up to the possibility of discovery, change and growth.

And finally there is how you use your time to take care of yourself during your practice session.

Make sure your taking lots of breaks (lasting even just a few seconds between iterations of whatever it is you’re practicing, to 5 to 15 minute breaks during your practice session). Doing this will not only keep you healthier (avoiding strain and injury), but will also keep your attentional capacity fresher and more effective.

So enjoy your extra practice time. Use these five checkpoints from time to time during your practice session. Be safe, and stay flexible, curious and productive.

New Jazz Etude: Harmonic Major Scale Wide Interval Study

This image has an empty alt attribute; its file name is Screen-Shot-2020-03-02-at-3.38.27-PM.png


The harmonic major scale (i.e., the major scale with a lowered 6th) is naturally full of color, and interesting contour. The most typical way to apply it to dominant 7th chords is to simply convert the diatonic scale relative to the dominant chord into harmonic minor (e.g., using a C harmonic major scale over a G7 chord, which adds the lowered ninth to the dominant 7th chord.) But in this etude, I’ve used a different harmonic major relationship over the dominant 7th chord. Take a look at the example at the top of the page.

I’ve applied an Eb harmonic major scale over the G7 chord. This is the harmonic major formed from the lowered sixth degree of the dominant chord itself (instead of the tonic chord). By using this scale, I can access several altered and natural tensions over the dominant chord: -13th (Eb), +9 (Bb, functioning enharmonically as A#), 3rd (Cb, functioning enharmonically as B natural), -9 (Ab) and 7th (F).

I’ve organized the notes of this scale into a melody with relatively wide intervals. As you can see, the melody begins with a descending major 7th and continues to unfold with lots 4ths, 5ths and 6ths. The angularity continues into and through the tonic (C Maj7). The unique sound/tension qualities of the scale combined with the wide intervals creates a highly energetic and unpredictable line that, though sounding “modern”, is well within the realms of even the most traditional bebop harmonic applications. If you’d like to explore wide interval melodic construction and application further, please consider my e-book, The Vertical Saxophone: A Methodical Approach to Wide Intervals (which, by the way, is easily applicable to any melodic instrument). For a free, downloadable pdf of this etude, please click the link below.:FileHarmonic Major Wide Interval Study-pdfDownload